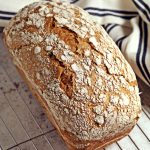
Easy Slow Cooker Sourdough Sandwich Bread
Easy Slow Cooker Sourdough Sandwich Bread needs just one rise, keeps your kitchen cool and saves you money. This recipe makes a delicious Malted Grain Sourdough Sandwich Loaf.
Servings 12 servings
Equipment
- large glass bowl
- Danish whisk or fork
- 900 g (2 lb) loaf tin
- Dusting wand
- Bread lame or scalpel
- Glass plate (large, for covering bowl)
- 6.5 L (6.8 Q) Slow Cooker (Crockpot)
- Tea towel
Ingredients
- 55 g starter
- 330 g tepid water boiled and cooled or filtered
- 250 g white strong flour
- 250 g strong malted wheat flakes & malt flour Cotswold Crunch or other strong brown flour mix
- 8 g salt flakes
- Rice flour for dusting
- Oil or butter for greasing tin
Instructions
- Start by feeding your starter with 30g of tepid cooled boiled or filtered water and 30 g strong white flour and leave on the kitchen counter with lid ajar. It should double in size and be bubbly when ready to use. Place an elastic band around the jar of starter to mark the original level. See notes1 for further timing information.
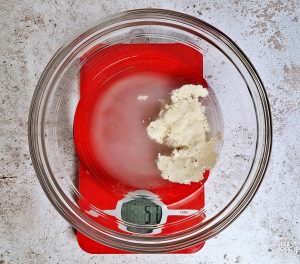
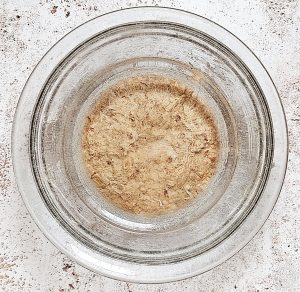
- Make the sourdough by weighing out 330 g of tepid (previously boiled or filtered) water and 55 g of bubbly, active starter into a large glass bowl. Agitate to break up with a Danish whisk or fork.

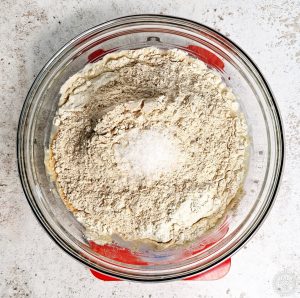
- Zero the scales and add 250 g strong white flour, 250 g Cotswold Crunch or similar and 8 g of salt flakes.
- Mix to a dough with a Danish whisk or fork. If the dough does not absorb all the flour add a little more water until it does. (More likely if using different flour and especially wholemeal).
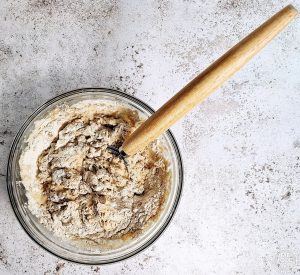
- Scrape down the sides with a dough scraper and mix the scrapings into the dough to form a shaggy dough. (Do not “knead” at this point, you’re just bringing the dough together).

- Cover the bowl with a glass plate and leave for 1 hour to rest at room temperature. This initial mixing and resting known as the autolyse stage.
- After an hour the dough will have spread out in the bowl. Then it’s time to stretch and fold the dough. Use a wetted hand (my new preference, see notes2) or a dough scraper and pull the dough up from one side and stretch across to the opposite side, rotating the bowl as you go. Do this approximately 40 times3 (but counting not important) until your dough doesn’t want to stretch anymore. The dough will come together as smooth ball that holds its shape. Takes about a minute or two to do.
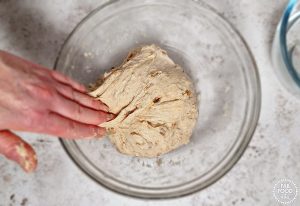
- Cover the bowl with a glass plate again and leave to rest for 30 minutes at room temperature.
- Repeat the stretches and folds 3 more times every 30 minutes placing the plate back over the bowl each time. You’ll only need half as many folds (then progressively less) to get a ball of dough that holds its shape more or less. You’ll feel the tension as it won’t want to stretch anymore.
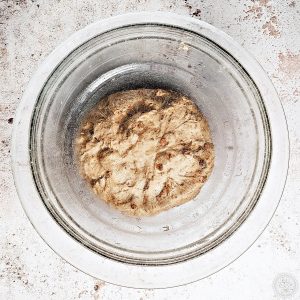
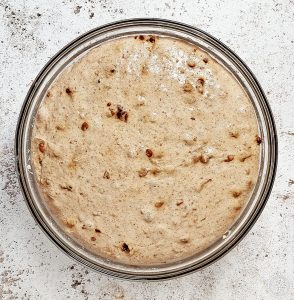
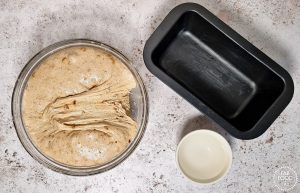
- After the final set of folds and stretches cover the bowl with upturned glass plate and leave the dough to prove (aka bulk fermentation) and double in size. The dough will take on a domed appearance and will bounce back when poked with a floured finger. This will take roughly between 8 – 14 hours depending on the temperature of your house but there is no set time4.
- Grease a 900 g (2lb) loaf tin with butter or oil.
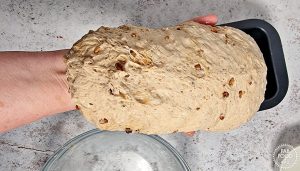
- Then with a wetted hand, do one last set of stretches and folds in the bowl and form an oblong loaf shape (creating tension at the base). Keep pulling and folding from all sides but particularly the longer sides until the loaf shape holds.
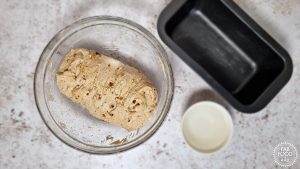
- Tip the bowl upside down dropping the dough onto a wetted hand and place it seam side down into the prepared loaf tin.
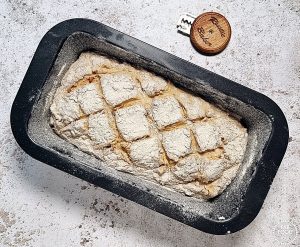
- Dust the top of the dough generously with rice flour (or leave plain, your choice).
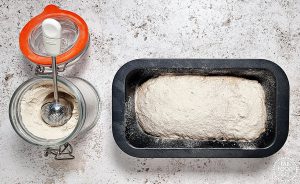
- If you’re ready to bake then use a lame to score the dough with a crisscross pattern6 or leave unscored. If you’re not ready to bake see Notes7.
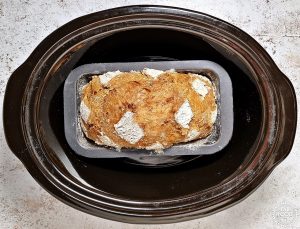
- Put the loaf tin into the slow cooker (Crockpot) and set heat to high and bake for 2 hours and 30 minutes. After 1 hour and 15 minutes, quickly lift the lid and place a folded tea towel under it to stop condensation dripping onto loaf.
- Carefully remove the lid and tea towel from the slow cooker and test the bread for readiness by pressing a finger gently into the top of the loaf. It should spring back. You can also tap or knock the base and there should be a hollow sound.
- If the loaf isn’t ready then continue cooking for another 15 – 30 minutes.
- Once ready, lift the sourdough loaf out of the slow cooker with oven gloves. Tip the loaf out of the tin and onto a cooling rack.
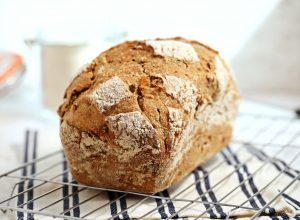
- Allow sourdough bread to cool completely (2 – 3 hours) before slicing8.
Video
Notes
- I feed my starter in the afternoon ready for making the sourdough in the evening ahead of overnight bulk fermentation. The time it takes your starter to be ready for use will depend on many factors including the time of year and temperature of your kitchen so you’ll get to know these the more you bake. Your sourdough making schedule will most likely differ from mine especially if you’re in a warmer country and will be much quicker.
- After using the scraper method for the pulls and folds for 2 years I actually ended up hurting my shoulder so I now use the wetted hand method which puts less strain on your joints.
- The number of times you do the pulls and folds will depend on your flour, humidity, etc so you might do 90. You just carry on until a ball that doesn't want to stretch any longer forms. The number of pulls and folds decreases with each proof as the gluten develops (making it more elastic).
- I leave my dough to rise overnight but the time to bulk ferment will vary with the season and temperature of your house. So slower in winter and quicker in summer.
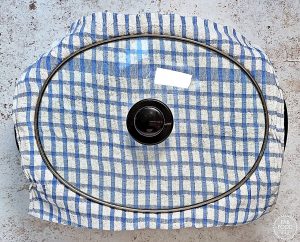
- Covering the slow cooker with a folded tea towel will prevent condensation from dripping down onto the sourdough.
- I found scoring with a crisscross pattern gave the most even bake/top to the loaf but feel free to experiment.
- If you’re not ready to bake after the bulk fermentation then cover the loaf tin (a cloth oval banneton cover is great for this) and place it in the fridge until you’re ready. Then dust with more rice flour, score with a crisscross pattern (or leave plain), and bake as per the recipe. You can leave the dough in the fridge for up to 24 hrs but the longer you leave it the bigger the loaf will get as the dough will continue proving. A bigger loaf means it’s likely to come into contact with the damp tea towel. It’s not a big deal, it’s purely cosmetic but your loaf will look like it has a damp patch on top. I accidentally left my loaf for an extra hour in the slow cooker and this decreased the look of the damp patch so you could just bake for a little longer if wished but it’s really not necessary.
- Slicing sourdough bread whilst still warm will result in a gummy loaf.