
Learn how to make and decorate a chocolate-filled Easter Egg with just a cardboard egg, some foil and a few sweets/chocolates!

PLEASE NOTE: I would make this Chocolate-filled Easter Egg with pure dark chocolate if I made it again, as it gives a more professional, glossy finish to the egg!
Every Sunday, I seem to find myself tuning in to watch Sunday Brunch on Channel 4.
I love the down-to-earth style of the presenting and laid-back approach to cooking on there. So last Sunday I had the intention of baking something for Easter, but hadn’t actually put my finger on what yet, but it was going to be either cookies or cakes.
That was until I saw Paul A Young (took me a while to realise it wasn’t my 80’s crush) making Easter Eggs on the show. I say making, I only remember the putting them together and decorating part.
So armed with 3 facts from the show, my baking idea flew out of the window.
The tips I learned from Paul were to never leave chocolate to cool in the fridge for longer than 10 minutes, or it will become wet.
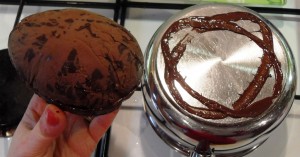
To seal the 2 halves of the egg together by holding them in contact with the bottom of a hot pan and then sticking them together.
Then, finally, to make a chocolate base, fill a muffin tray mould with melted chocolate!
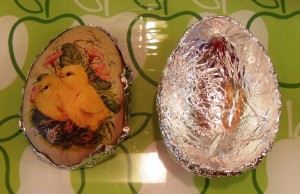
So after lunch and a trip to the shops, I trotted to the kitchen and dug out an old cardboard Easter egg, which was going to be my mould that I would line with foil.
This turned out to be a great idea, apart from the fact that I was down to my last strip of foil, which was glued to the roll, and so removing the foil from the card egg was nearly impossible.
Luckily, perseverance paid off, and eventually I got the one stubborn egg half to extract itself. I was starting to have flashbacks of my Valentine’s Chocolate where I’d make them in an unlined mini muffin tin, and there they wished to stay!
On my trip around the shops, I’d seen a lovely egg which was just a mesh/lattice of milk chocolate that you could see through – maybe I could do the same, I thought?
Once I got started and was applying my pattern of milk chocolate, I realised that with my limited chocolate-making equipment (a teaspoon), this was not an option, so I just decided on a milk chocolate pattern to which I’d add a base of dark chocolate.
I gauged the amount of chocolate I’d need by eye, so if you’re making a larger egg, do the same.
I’ve heard about tempering chocolate, and I believe that this needs a thermometer and a marble surface, so I didn’t bother with this!
However, fast forward to Easter 2026, and I watched Paul A Young on Saturday Kitchen.
Here he said you could melt 2 thirds of your chocolate and add the last third off the heat, which would negate the need for tempering!
My milk chocolate did go cloudy, so possibly I over-heated it, but the plain chocolate stayed shiny, so I think another time I’d stick to that for a more professional finish.
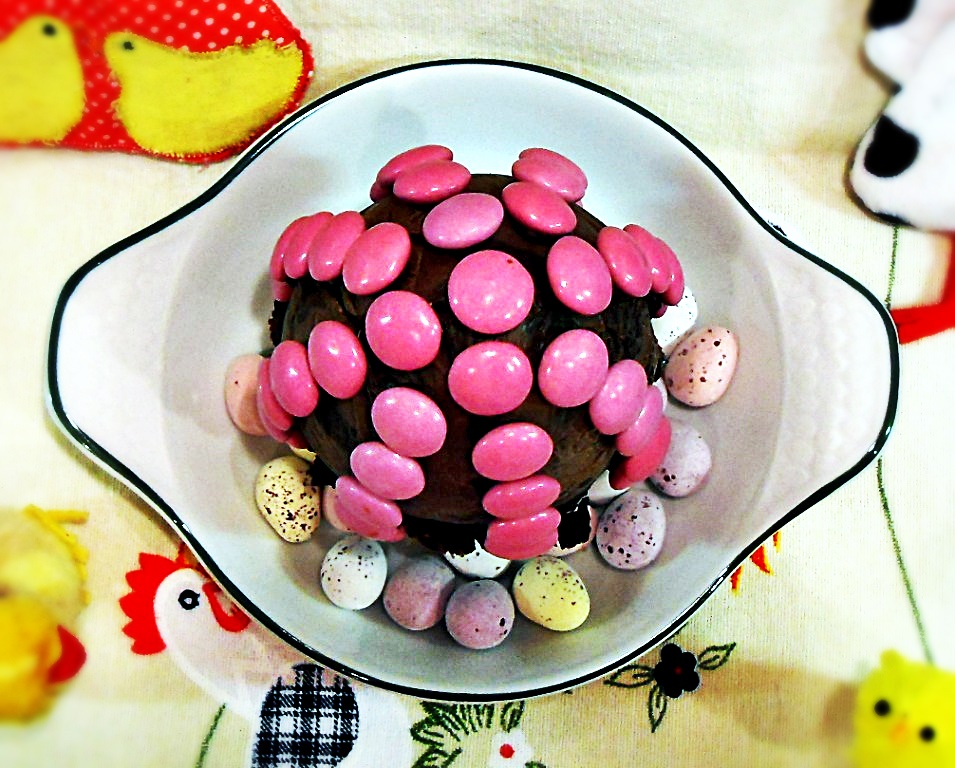
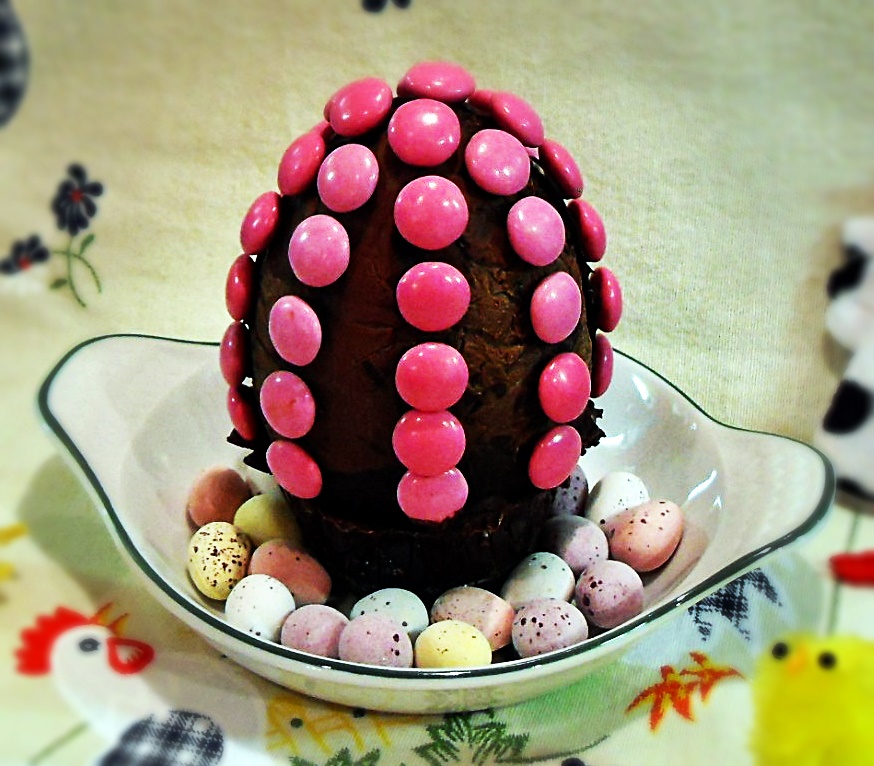
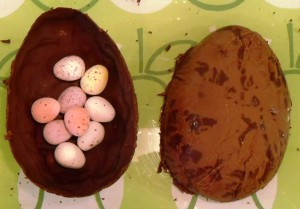
Once I’d decorated my egg with Smarties, though, it didn’t really seem to matter that you could see crinkles from the foil or that the milk chocolate didn’t look perfect.
My daughter, who helped me, begged for the egg to be hers – I don’t blame her, as I think it is nicer than the kids’ eggs you get in the shops, and you can decorate and fill it with exactly what you like.
So why not be brave and have your own Blue Peter moment by making this homemade Chocolate Easter Egg?
Next year I’m going to be really organised and make lots of Easter eggs as they really are fun to make and it puts a smile on my face every time I look at our little creation! Happy Easter.
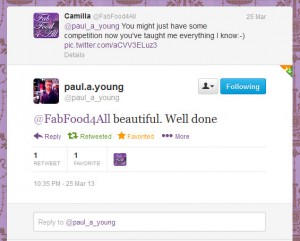
Ooh, and I nearly forgot to mention that I had a lovely tweet from the man himself:
Pin this homemade Chocolate Easter Egg for later!

Leave a comment and rating below when you’ve made this recipe; I love getting your feedback! You can also share your pictures by tagging @FabFood4All over on Instagram.

Chocolate filled Easter Egg
Ingredients
- 50 g Milk or White Chocolate
- 100 g Plain Chocolate
For base & sticking on sweets/chocolates:
- 60 g Plain Chocolate
Decoration/Filling
- Mini chocolate eggs, Smarties, sweets etc
Instructions
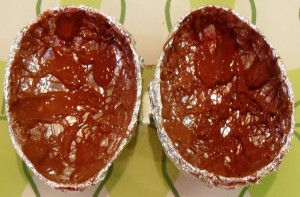
- Line 2 halves of a cardboard egg (the size of your hand) with a sheet of foil leaving at least an inch of foil around the edge as you’ll need this to pull out the chocolate later.
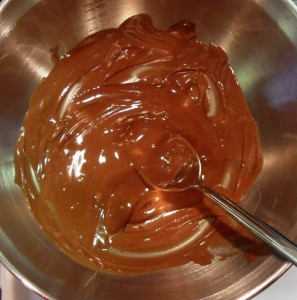
- Melt the milk or white chocolate in a bowl over a pan of water over a very low heat. Do not over heat the chocolate.
- Using a teaspoon swirl the chocolate over the foil bases.
- Put in the fridge to set for a maximum of 10 minutes
- Then melt the dark chocolate over a pan of water again.
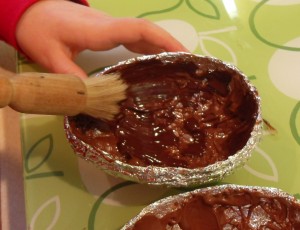
- Then using a pastry brush paint the dark chocolate over the milk layer, trying to keep the chocolate thicker at the top edge. I did this in one hit but in hindsight it might have been better to do this in 2 stages.
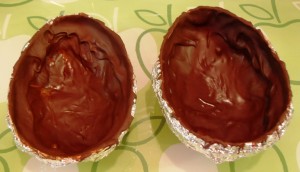
- Put in the fridge to set for 10 minutes (maximum) and if not completely set just wait for it to set at room temperature. I allowed mine to set curved side down but maybe left the other way up on baking parchment would have been better. The thin edges didn’t seem to matter though once I’d melted and welded them together.
- Meanwhile melt the 60g of dark chocolate and almost fill a foil lined muffin tin mould with chocolate to use as a base for your egg. (I’d run out and had to use cling film).
- Once set pull the foil from card eggs and gently peel the foil off the chocolate.
- Then using the hot pan that you heated the water in push the open side of each egg half onto the pan to melt slightly, fill with chocolate/sweets then fuse the halves together.
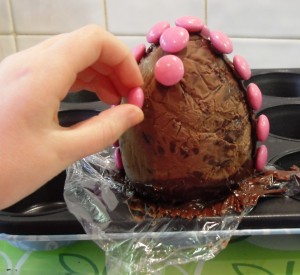
- Put the egg onto your chocolate base and hold for a few seconds until it sits upright.
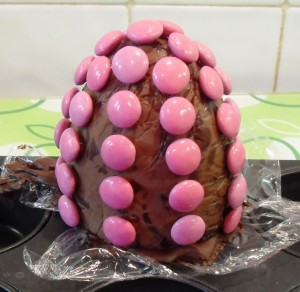
- Now decorate your egg using the rest of your melted chocolate as a glue.
- Once the base has set, remove the foil and place in a pretty bag and add a few more chocolates/sweets. I find roasting bags very handy for this part! Tie with a bow et voila! Happy Easter.
Margaret gallagher
Thought this would be so difficult to make
With your instructions I think I could make it as Grand as yours
Camilla
Thanks Margaret, it is quite straight forward and really fun to make:-)
Emma @ Adventures of a London Kiwi
Oh I LOVE this – Blue Peter has left us such a legacy!
Camilla
Thanks Emma, what it lacks in skill it makes up for in enthusiasm:-)
Liv Fitzgerald
It is actually a really good idea. What would you use if you didn’t have a wooden egg for the mould or an egg mould though?
Camilla
Hi Liv it was a cardboard egg from my childhood and if I didn’t have one then I’d buy one or I imagine you can get a real Easter Egg mould in somewhere like Lakeland or a craft shop.
Liv Fitzgerald
It looks amaz Camilla. I really badly want to eat that. I am definitely going to make that this Easter. I would definitely try to eat that in the one go. Oh my god! You are so good.
Heather Haigh
What a clever idea. I must try this next year – I could make my own raw, dairy-free, egg.
Ursula Hunt
This is a lovely idea
Camilla
Thanks Ursula;-)
Kaci Soderstrom
It might be January but I’m already thinking about Easter.. and this looks awesome and so easy to do! I want to make this now.
Camilla
Aaw thanks:-)
William Gould
OMG Who’d have thought it was this easy….
Hafsah
This is truly excellent! 😀
Camilla
Thanks:-)
Paul Wilson
Wow, very nice.
Janice
Well done you! I think I may even have some moulds somewhere although I might have got rid of them as I don’t remember seeing them for a while. I think I’ll give the Easter Eggs a miss this year as I’ve stuffed my face for a week and fruit seems more appealing (shock horror!)
Camilla
Thanks Janice! That is shocking, you want fruit not chocolate, this can’t last surely?
Jacqueline @How to be a Gourmand
Well done Camilla. I reckon you could do a roaring trade in handmade Easter eggs 🙂
Camilla
Aah thanks Jacqueline. I really did cut my teeth on this one so I’m sure the next ones would be perfect and they’re such fun to make and the shop bought ones seem so expensive now!
May
What a great idea. I don’t have any egg moulds to try this with. Will have to hunt some down.
Camilla
Thank you. I grew up with cardboard eggs and always used to look forward to choosing the sweets from the traditional sweet shop to put in it!
Jacqueline
Brilliant and I love the pan trick. I saw this programme too, but not until after Cooper had already made his egg. His nana enjoyed it.
Camilla
Thanks Jacs and it was a great programme, it’s not often I’m inspired by a few tricks to do something I’d never intended to do:-)
Jen @ BlueKitchenBakes
Such a simple but effective way to make a beautiful looking Easter egg and so much cheaper than the bought ones. Even if you used posh chocolate to make the eggs it would still probably work out cheaper so this is a great idea.
I’m also very impressed by how clean the bottom of your saucepan is, makes me feel like I should give mine a good scrub!
Camilla
Thank you Jen, I’d love to make more eggs as I think you would get better with practice. My clean pan is one of a set of Stellar pans we had as wedding presents over 18 yrs ago. They go in the dishwasher a lot so it must be down to that, plus their as good as they were when we got them:-)
Angela Darroch
Great idea for the mould. I’ve always wanted to make my own eggs but always leave it too late to buy my mould. If you want to try and temper chocolate then try this link http://www.howtocookthat.net/public_html/how-to-temper-chocolate-in-the-microwave/ No need for a thermometer and really easy. Makes such a difference.
Hope you have a lovely Easter.
Camilla
Thanks Angela. I’ll check that out the next time I make some eggs, thanks for the tip;-)