
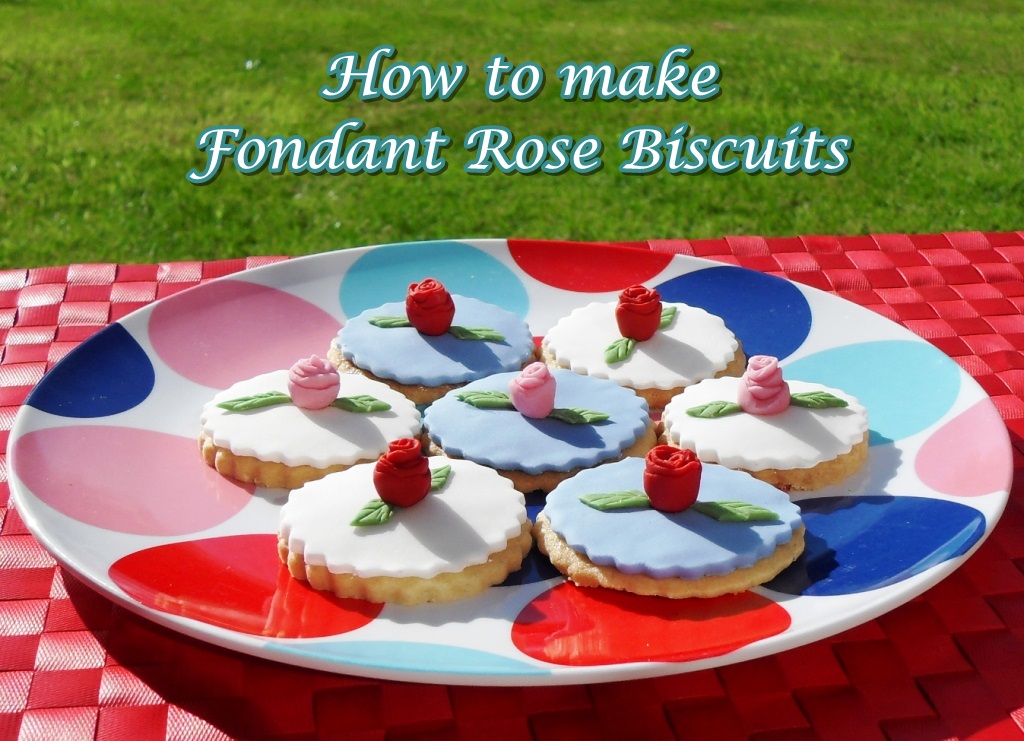
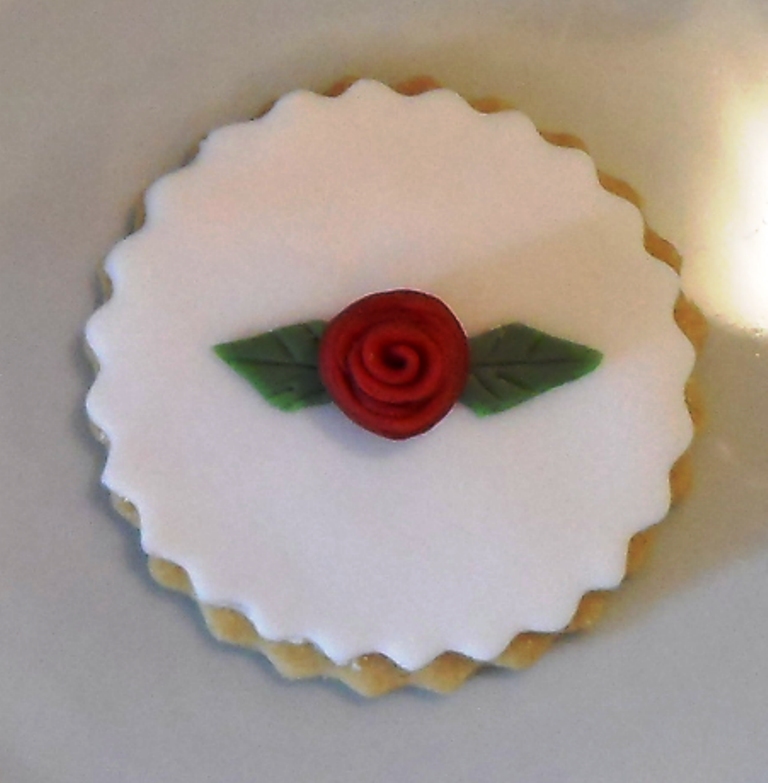
Today I’m sharing how to make Fondant Rose Biscuits!
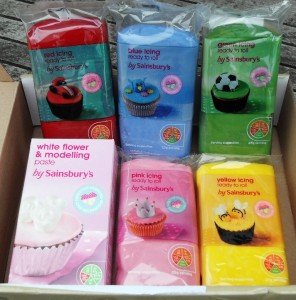
I was recently asked by Sainsbury’s if I’d like some ready to roll icing in various colours. I’ve always felt a little bit of envy when I’ve come across a beautifully decorated cake or biscuit but somehow this area of creativity has passed me by. So with this in mind a jumped at the chance to road test some icing!
My mind starting buzzing with all sorts of ideas. The one that stuck, was I think inspired by all the lovely Gromit dog statues which have recently been decorated by various designers and celebrities and I particularly like the one decorated by Kath Kidston with her signature rose design. She also tends to have a lot of pale blue in her designs so I put some of that into these biscuits too. (Come to think of it my Kath Kidston oven gloves are blue with roses)!
Since making my Fondant Rose Biscuits I have learned that a rub down of my worktop saver with some Trex (it’s colourless and flavourless) would have saved my icing from sticking to the board. You don’t turn the icing over but just swivel it round. So next time I work with ready to roll icing I will be a lot quicker and hopefully have even better results.
I was sent a page of instructions of how to make an individual rose which looked beautiful but being an impatient kind of a “girl” I wanted to do something quicker.
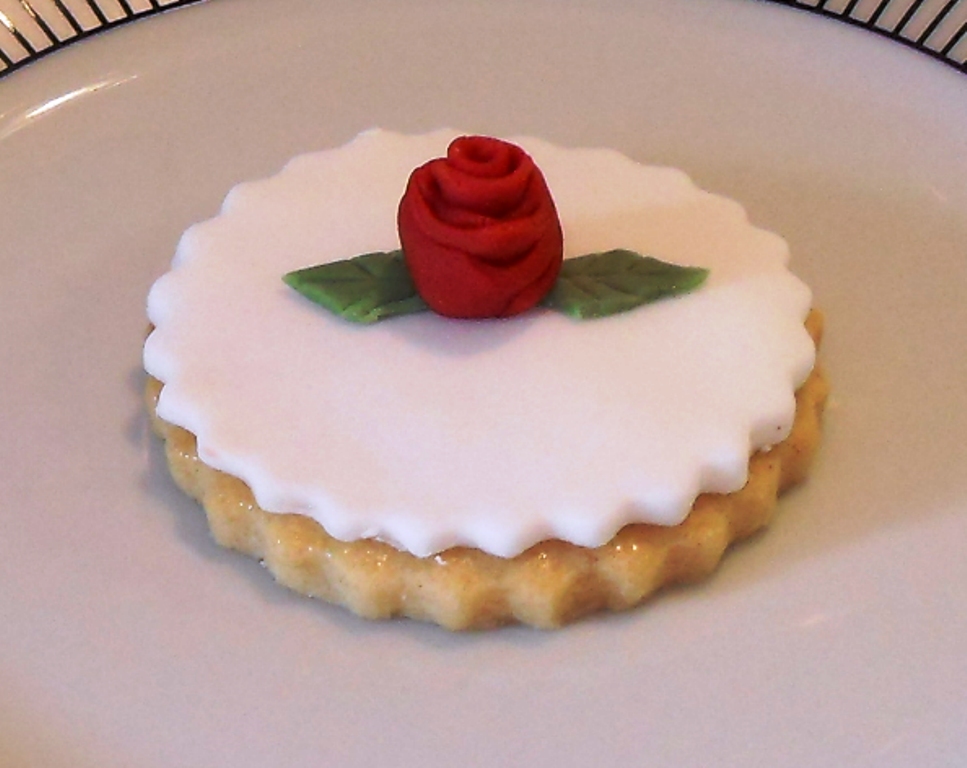
I decided to apply the same principle of making a tomato rose which I learned during a stint in catering – you peel your tomato like an apple and then roll up the skin and it makes a rose! After a practice rose or two I decided that the result was quite pleasing and then proceeded to make my leaves which were based on the pastry ones I also learned from Chef!
This decoration would also work really well on cupcakes. I made up a batch of shortbread biscuits which I shall post at a later date (or this would have been the longest post ever)!

What you will need:
Packets of Ready to Roll Icing in at least White, Red & Green
Shortbread biscuits or your favourite biscuit
A fine paintbrush
A pot of water
A rolling pin
A glass or non-stick mat
For each stage of making, pull off a small amount of ready to roll icing and give it a good kneading in your hands to get it pliable.
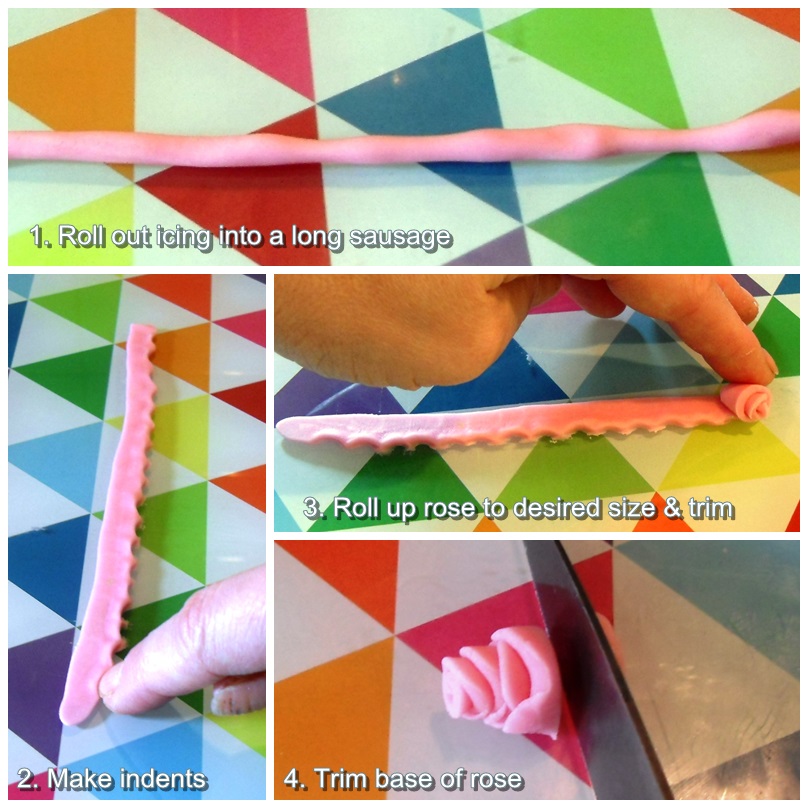
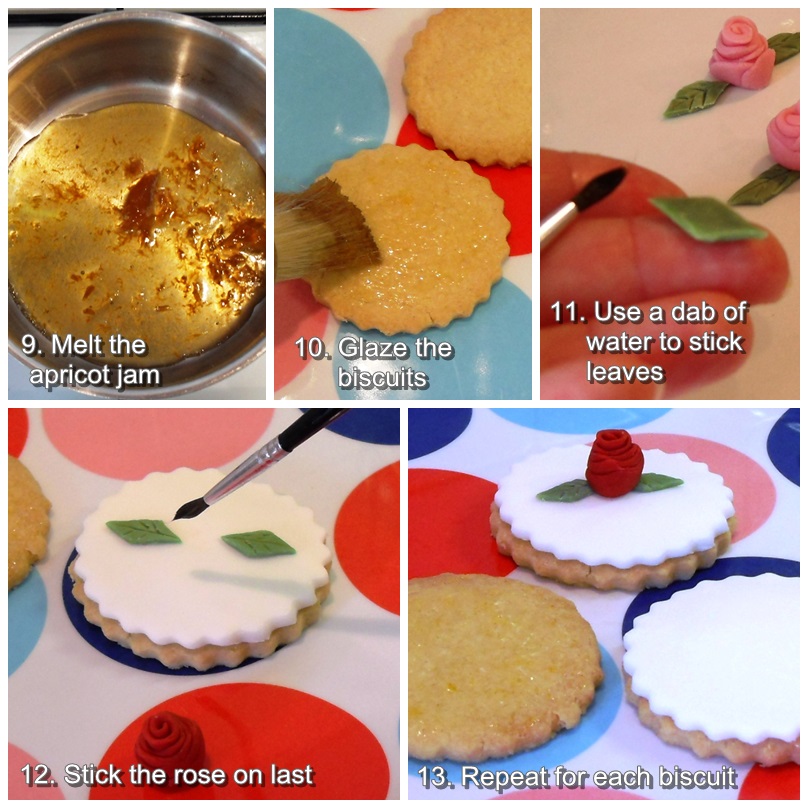
So here’s my guide in pictures:
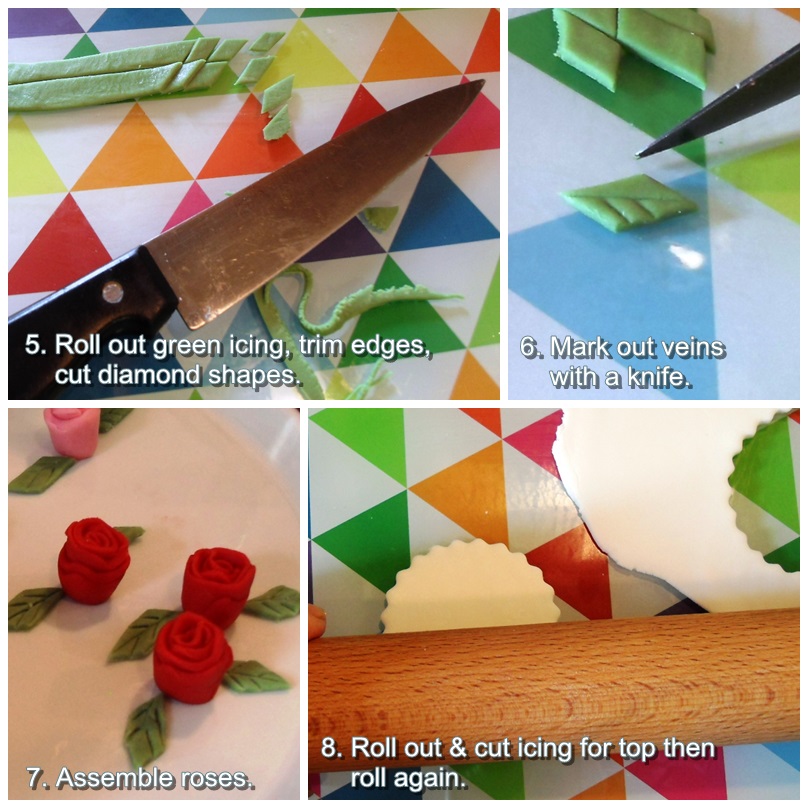

NB: In stage 8 you need to roll out the fondant circle a bit flatter to get the coverage as home made biscuits tend to spread on baking. (Using the same size cookie cutter as originally used for biscuits).
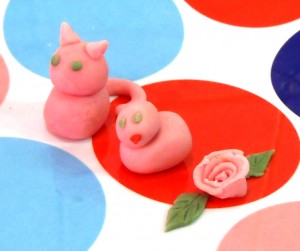
Don’t forget to get the kids involved, here are some decorations which my daughter made and didn’t eat!
And one last picture, or maybe two!

Now you know how to make Fondant Rose Biscuits I hope you have a go. Do share you pics with me, I’d love to see on social media, just tag @fabfood4all for me to see!
Check out what I did with the rest of the icing in my Pumpkin Fruit Cake post!
NB: Thank you to Sainsbury’s for the ready to roll icing, I was not paid for this post.
Maya Russell
These biscuits are pretty, delicate and gorgeous! I must have a look at the ready roll icing.
Paul Wilson
They’d be lovely with my tea.
Camilla
I think you’d have to throw a tea party in their honour Paul:-)
Ursula Hunt
These looked lovely at our coffee morning and sold really well
Camilla
Oh that’s lovely to hear Ursula:-)
Anne Dalzell
These remind of little german biscuits that i could buy when i was a little girl. so delicate and tasty
Camilla
Aah, love childhood food memories:-)
Ursula Hunt
I love a homemade biscuit with a cup of tea
bev
How showy!
Paul Wilson
They look amazing.
Ursula Hunt
very delicate and pretty looking biscuits
Camilla
Thank you Ursula:-)
Amie
Such beautiful work. And inspiring to try out.
Thanks for sharing.
Camilla
Thank you so much:-)
Heather Haigh
Those look seriously pretty. I’m rubbish at decorating but I reckon I could give that a try – the instructions are lovely and clear. Thanks!
Camilla
Thank you, it was a bit of a labour of love:-)
Ursula Hunt
must do this with my grandchildren they look lovely
Camilla
Thank you, I’m sure they’ll have fun as it’s so easy:-)
Lisa Williams
so pretty and surprisingly not too hard to make thank you 🙂
Jane @ Family Clan Blog
I love these biscuits, so cute, but chic. Perfect for when Mother comes around LOL.
Thank you for the lovelly idea.
Jayne
These look so beautiful. I would not want to eat them.
Kalyan
Just mouthwatering…looks delicious!
Franglais kitchen
These looks really pretty. Something I shall be trying out as you have made it look simple. Love the step by step pics too
Sandra Clarke
These look lovely, I just hope mine turn out as good.
Judith @ Mostly About Chocolate Blog
Oh dear goodness these look AWESOME and I just can’t imagine ever making roses that look as good as yours but you make it look so straightforward and easy I have to try!!
Camilla
Thank Judith. They really are childs play and my daughter had no problem making them either. Do show and tell if you make them:-)
DANIELLE VEDMORE
They are really cute! I have never made roses before – always look too difficult but you have made it seem really easy. Next time Im going to give it a try!
Camilla
Thank you. I’m all about taking shortcuts:-)
haxel
They look absolutely gorgeous – would be fantastic for a birthday party.
Hazel Rea
Anne Wallwin
they look lovely and straight forward to make.
Janice
Lovely looking biscuits, very professional!
Camilla
Thank you Janice, one trys one’s best:-)
Jacqueline @How to be a Gourmand
Considering this is new to you, I’d say you have a natural gift. Expertly done and looks completely error free. I’m sure your daughter really enjoyed helping you make these biscuits. So pretty!
Camilla
Aah Jacqueline, that just makes all the hard work so worthwhile reading that, thank you so much:-)
Elizabeth
Very cute! Love the Trex idea! I’ll have to try that next time I’m playing with sugar paste. 🙂
Camilla
Thanks. It was actually Victoria @ Kick at the Pantry doors idea which I further researched:-)
Anneli (Delicieux)
Very pretty Camilla! It’s little touches like that which can make all the difference. Lovely x
Camilla
Thank you Anneli it’s nice to do somthing pretty for a change:-)
Angela
What gorgeous biscuits. I have a whole cake tin full of fondant icing left over from making birthday cakes but never really thought to use it on biscuits. The kids would love it.
Camilla
Thanks Angela. As a kid our local baker sold biscuits covered in fondant and dipped in chocolate so the idea started there The fancy animal biscuits will have to wait for another day though as I ran out of time!
Kate
Hi Camilla,
Those are absolutely beautiful and it’s a great tip to use something like Trex on the worktop before starting.
Cheers,
Kate
Camilla
Thank you Kate and yes I wish I’d known about the Trex before I started, but that’s the joy of learning by your own mistakes:-) Onwards and upwards!