
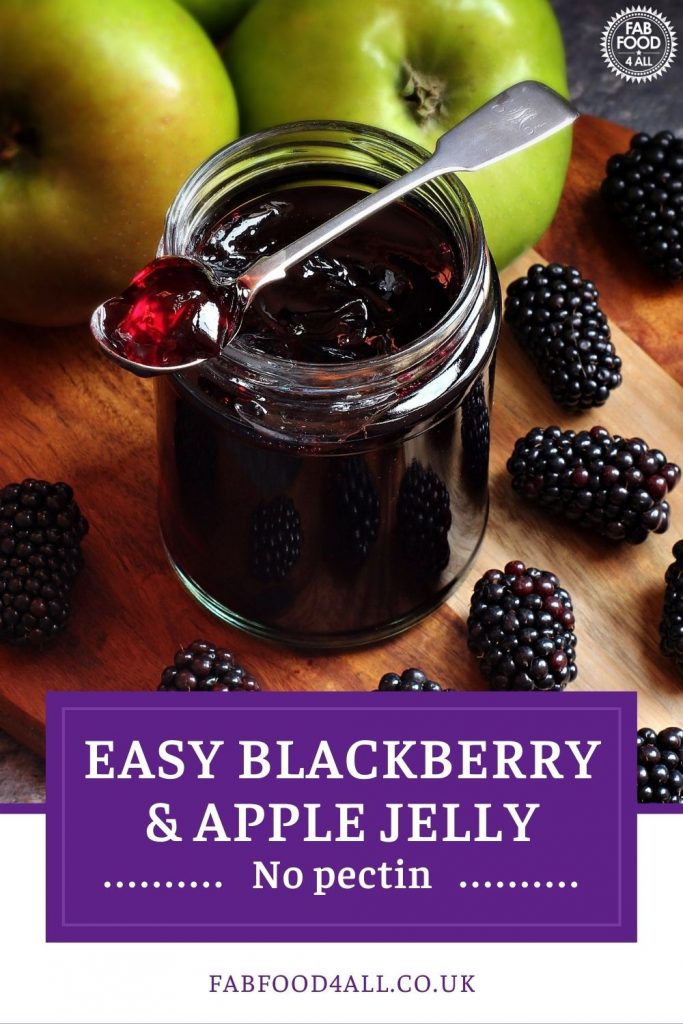
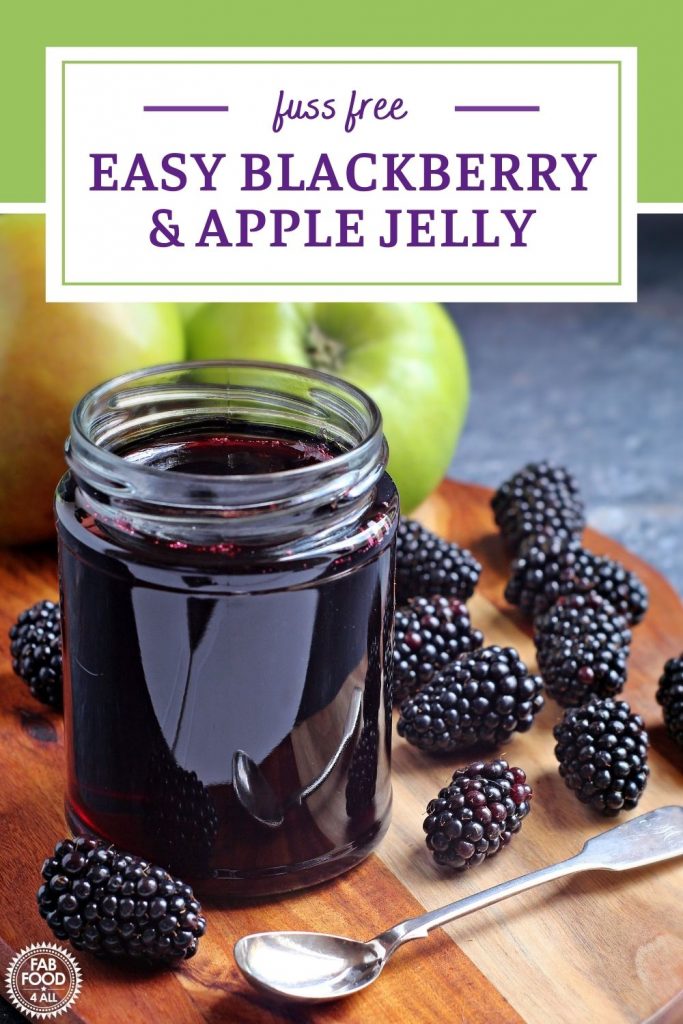
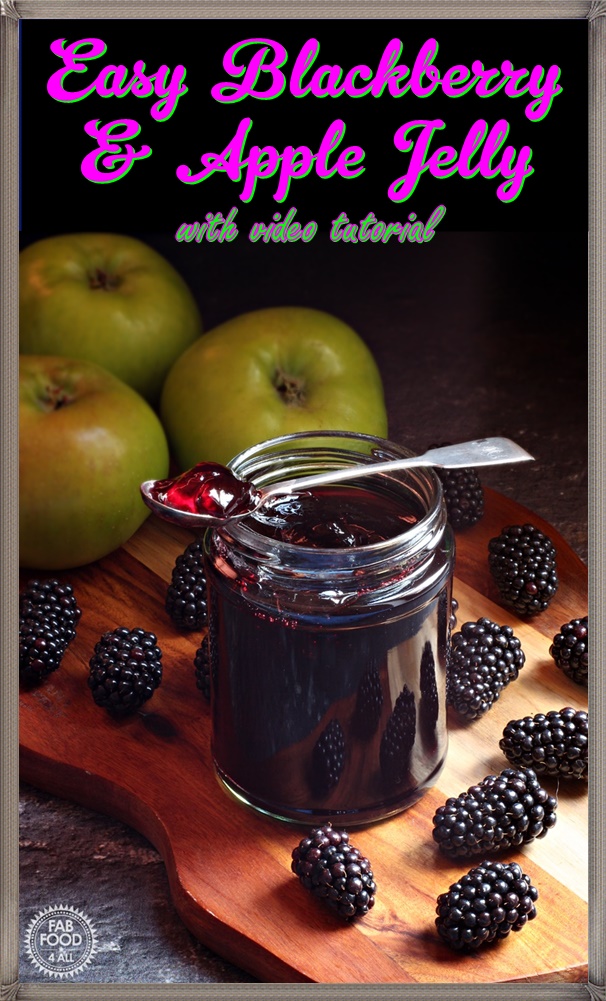
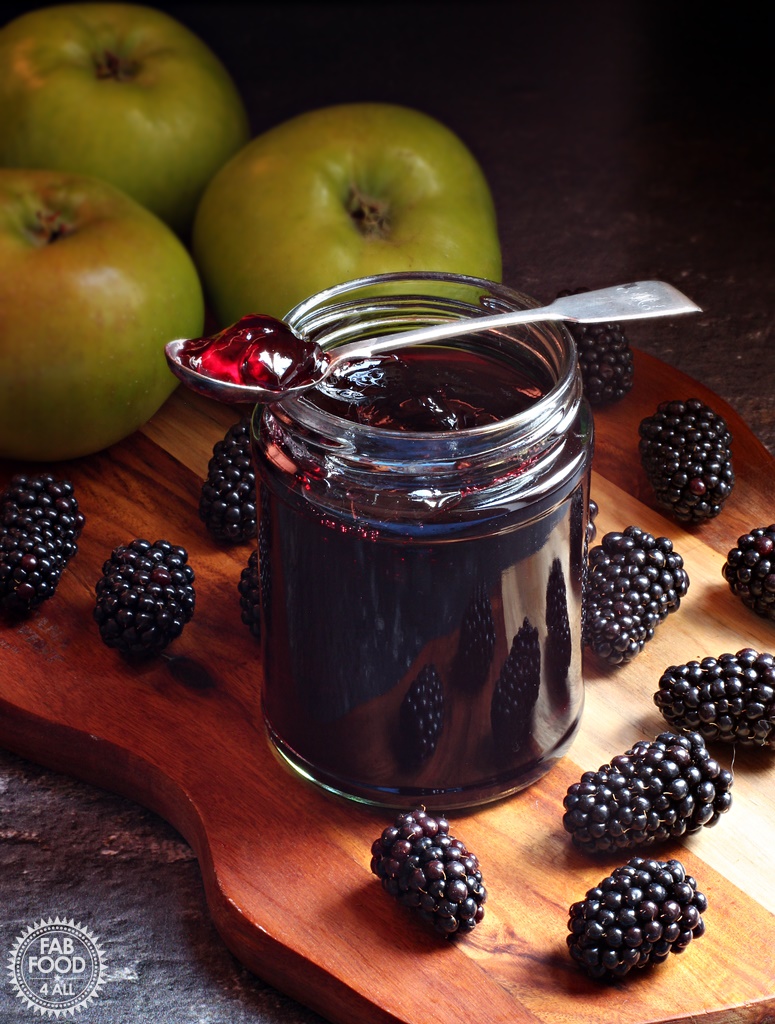
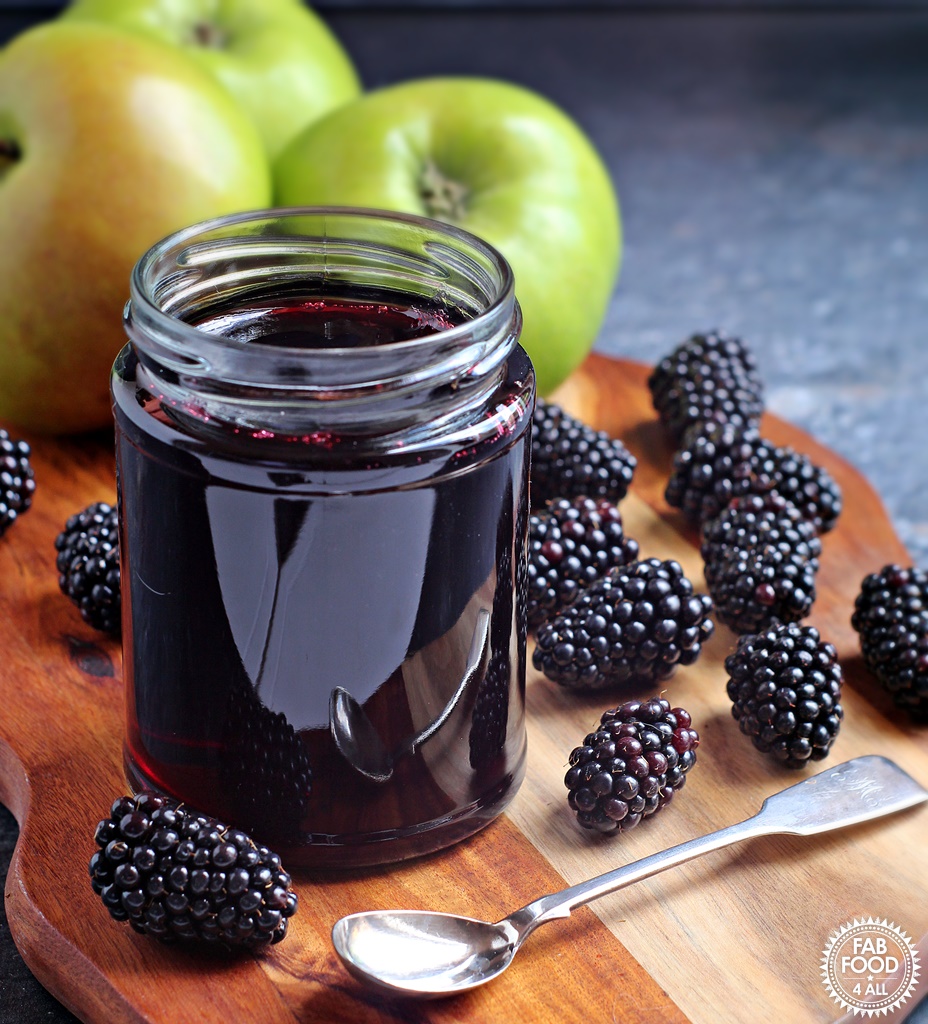
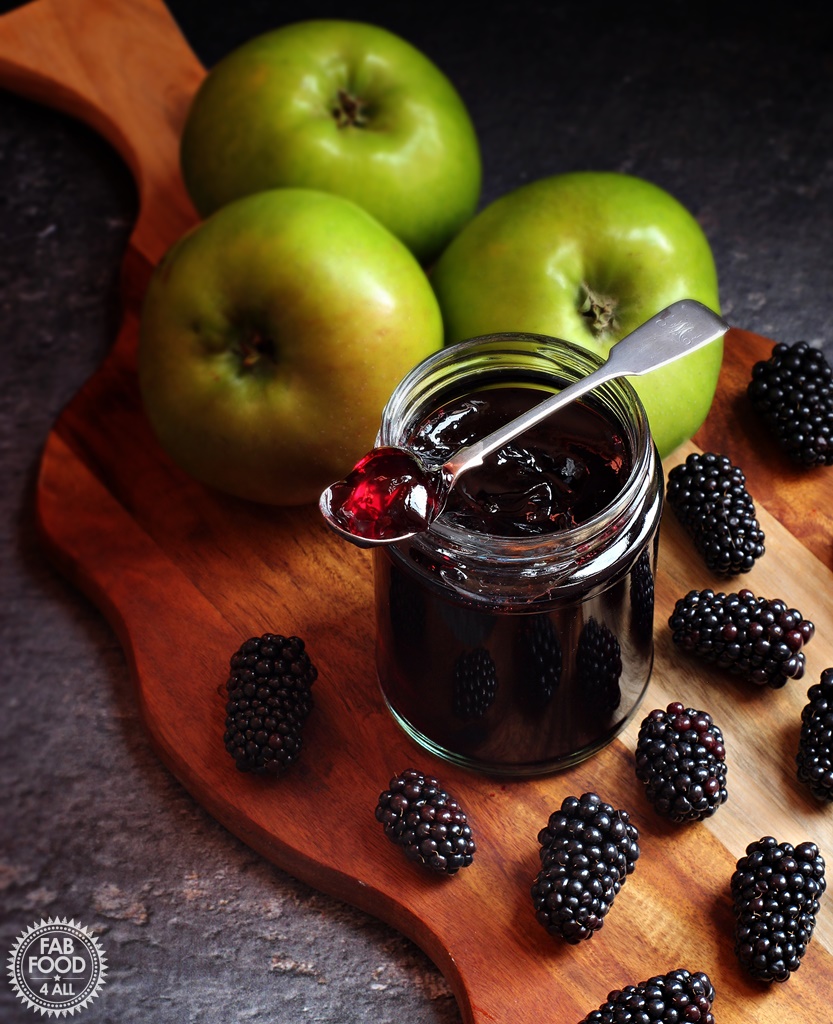
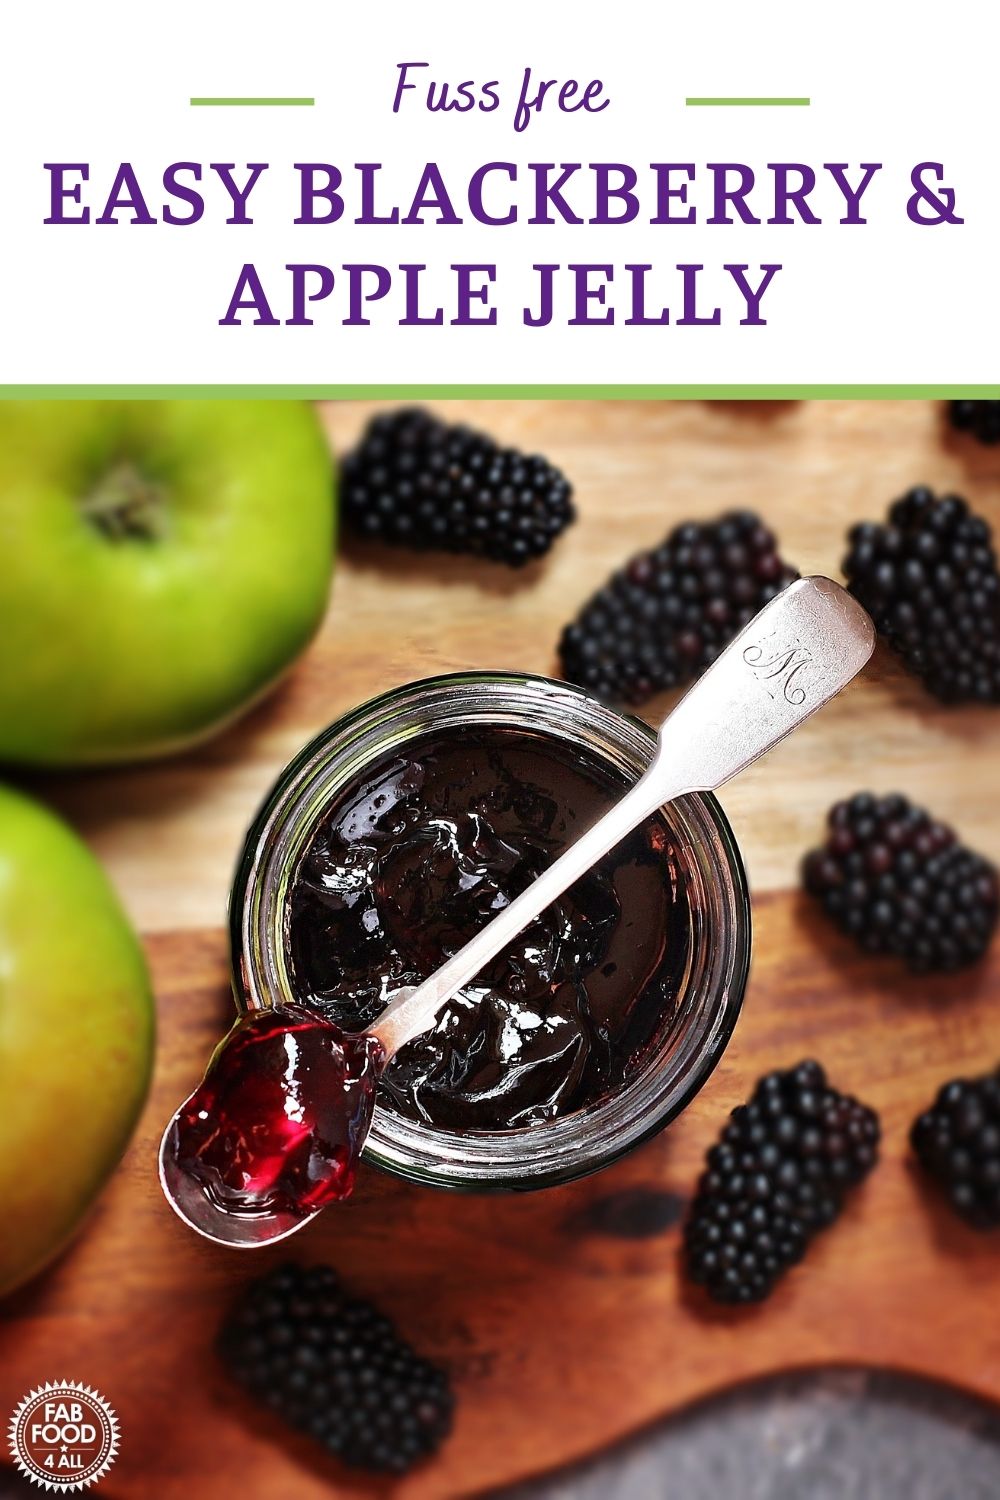
Today I’m sharing with you my Easy Blackberry & Apple Jelly with a step-by-step video tutorial, but perhaps I should have called it Bramble Jelly?
I have to admit to having had a mental block where jelly was concerned. It just conjured up images of upturned stools, muslin or jelly bags, and as I didn’t own any of these, I gave up without even looking into the subject further.
However, my appetite to make jelly was whetted recently by seeing lots of chatter about jelly on Facebook, so I decided to grab the bull by the horns and get over myself!

At the back of my mind, I remembered seeing mention of being able to use tights to make jelly, so after a quick Google for images, I drew a blank, but there were mentions of using tights at least.
Turns out you can use so many things to strain the cooked fruit in jelly making, ranging from net curtains to tea towels, muslin cloth, jelly bags, conical fruit strainers, etc.
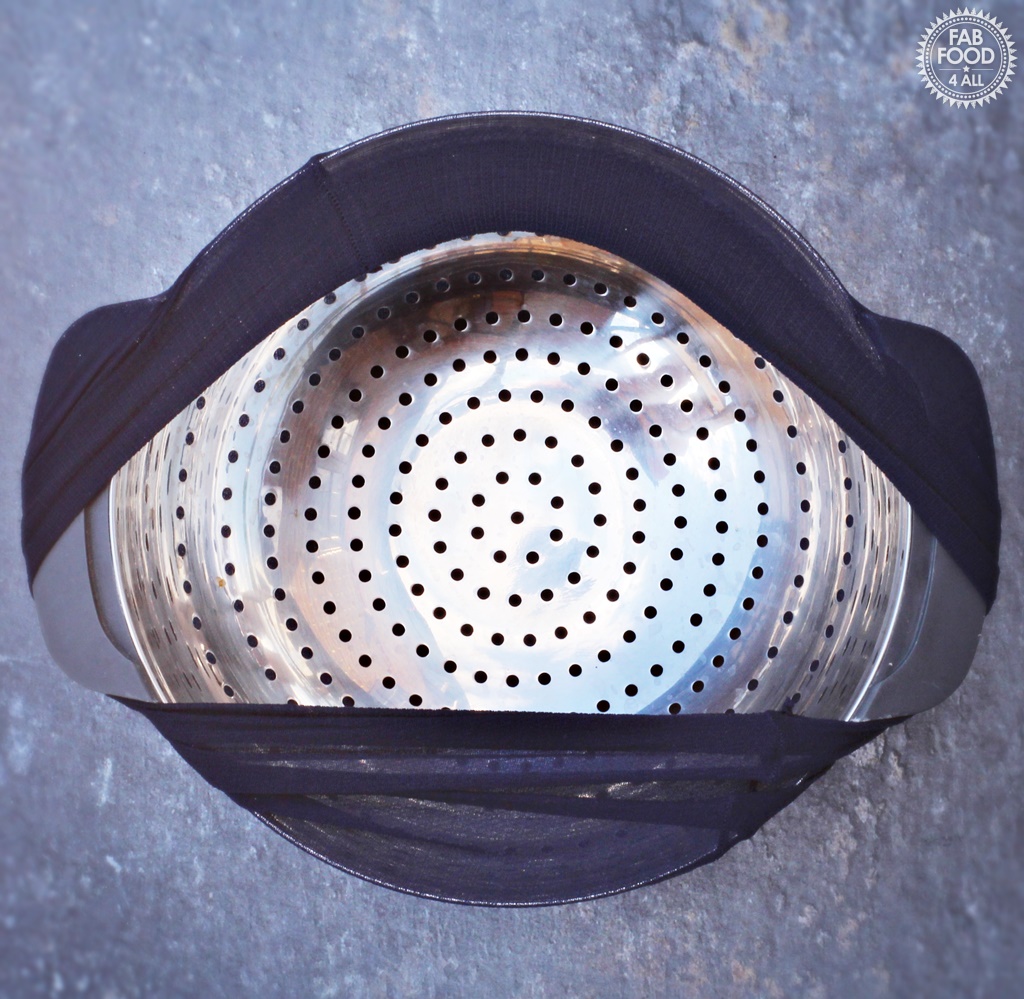
So, with no detailed instructions about the tights (I couldn’t just fill them as I didn’t have a stool to hang them from), I embarked (Blue Peter style) on making a strainer with a colander.
First, I found a brand new pack of 40 denier tights (any denier will do), I say brand new, they were from the closing down sale at Safeway some 15 years ago, LOL! Pleased to have finally put them to good use!
Then I took my colander and popped it into the tights, tied the legs to one side in a knot, and then trimmed off the legs.
That took all of 20 seconds, so at this point, I’m feeling a little stupid for never having pursued jelly making before now.
The next thing I needed was something to suspend the colander over that was deep enough to catch the drips of juice without touching it.
This turned out to be the pan I use for preserving itself!
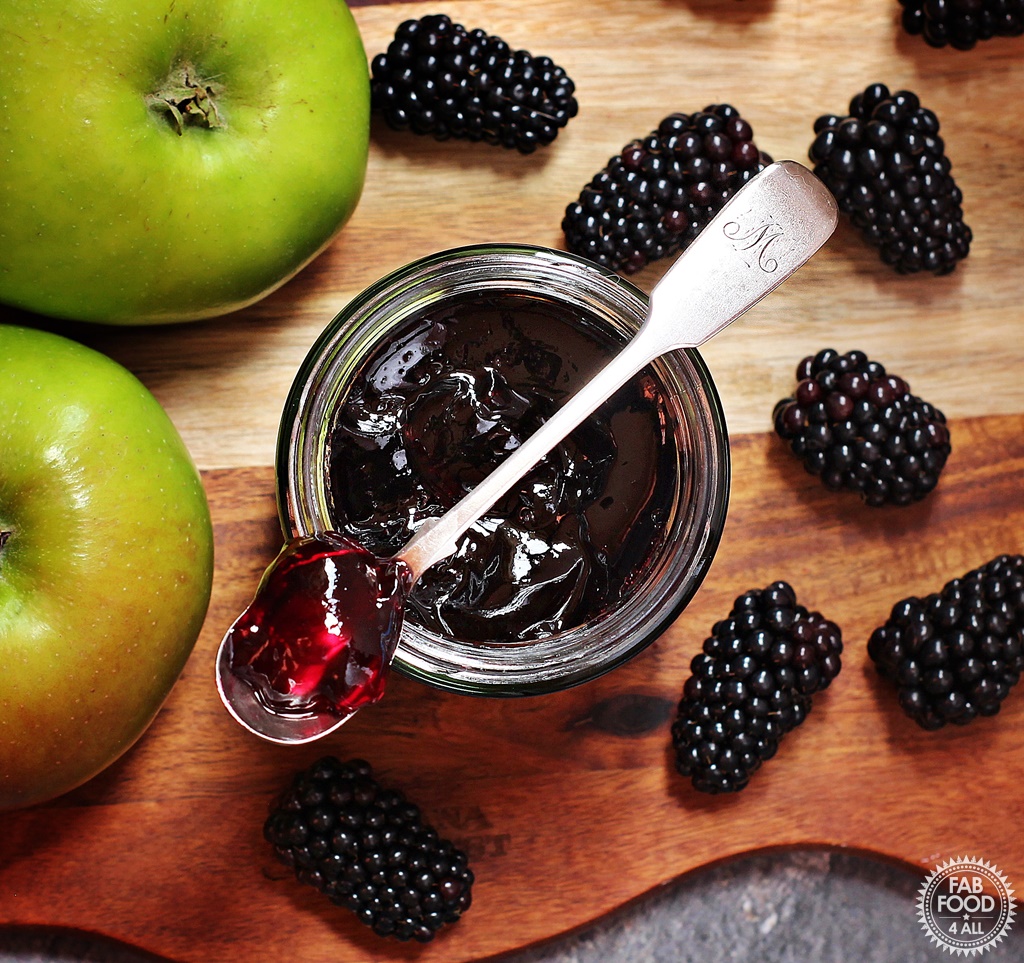
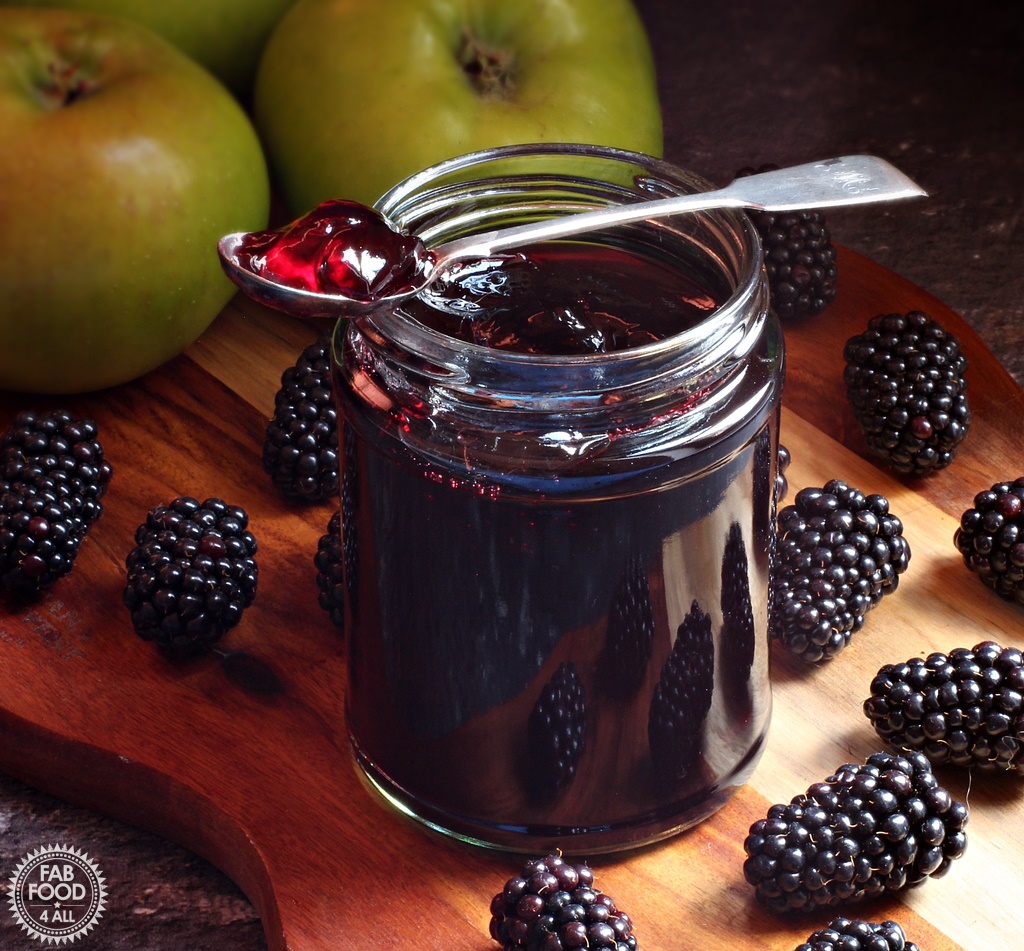
I came across reduced blackberries and Bramley apples last week, so as I’ve already shared Easy Blackberry & Apple Jam, I decided to embark on Easy Blackberry & Apple Jelly.
I noticed the blackberries in our local park are just starting to ripen, so it’ll soon be time to forage for free blackberries (which is what I usually do)!
Hopefully, if you’ve been like me and avoided making jelly because it all seemed too complicated, this recipe will persuade you to think again.

So what did my Easy Blackberry and Apple Jelly taste like, and what can you use it for?
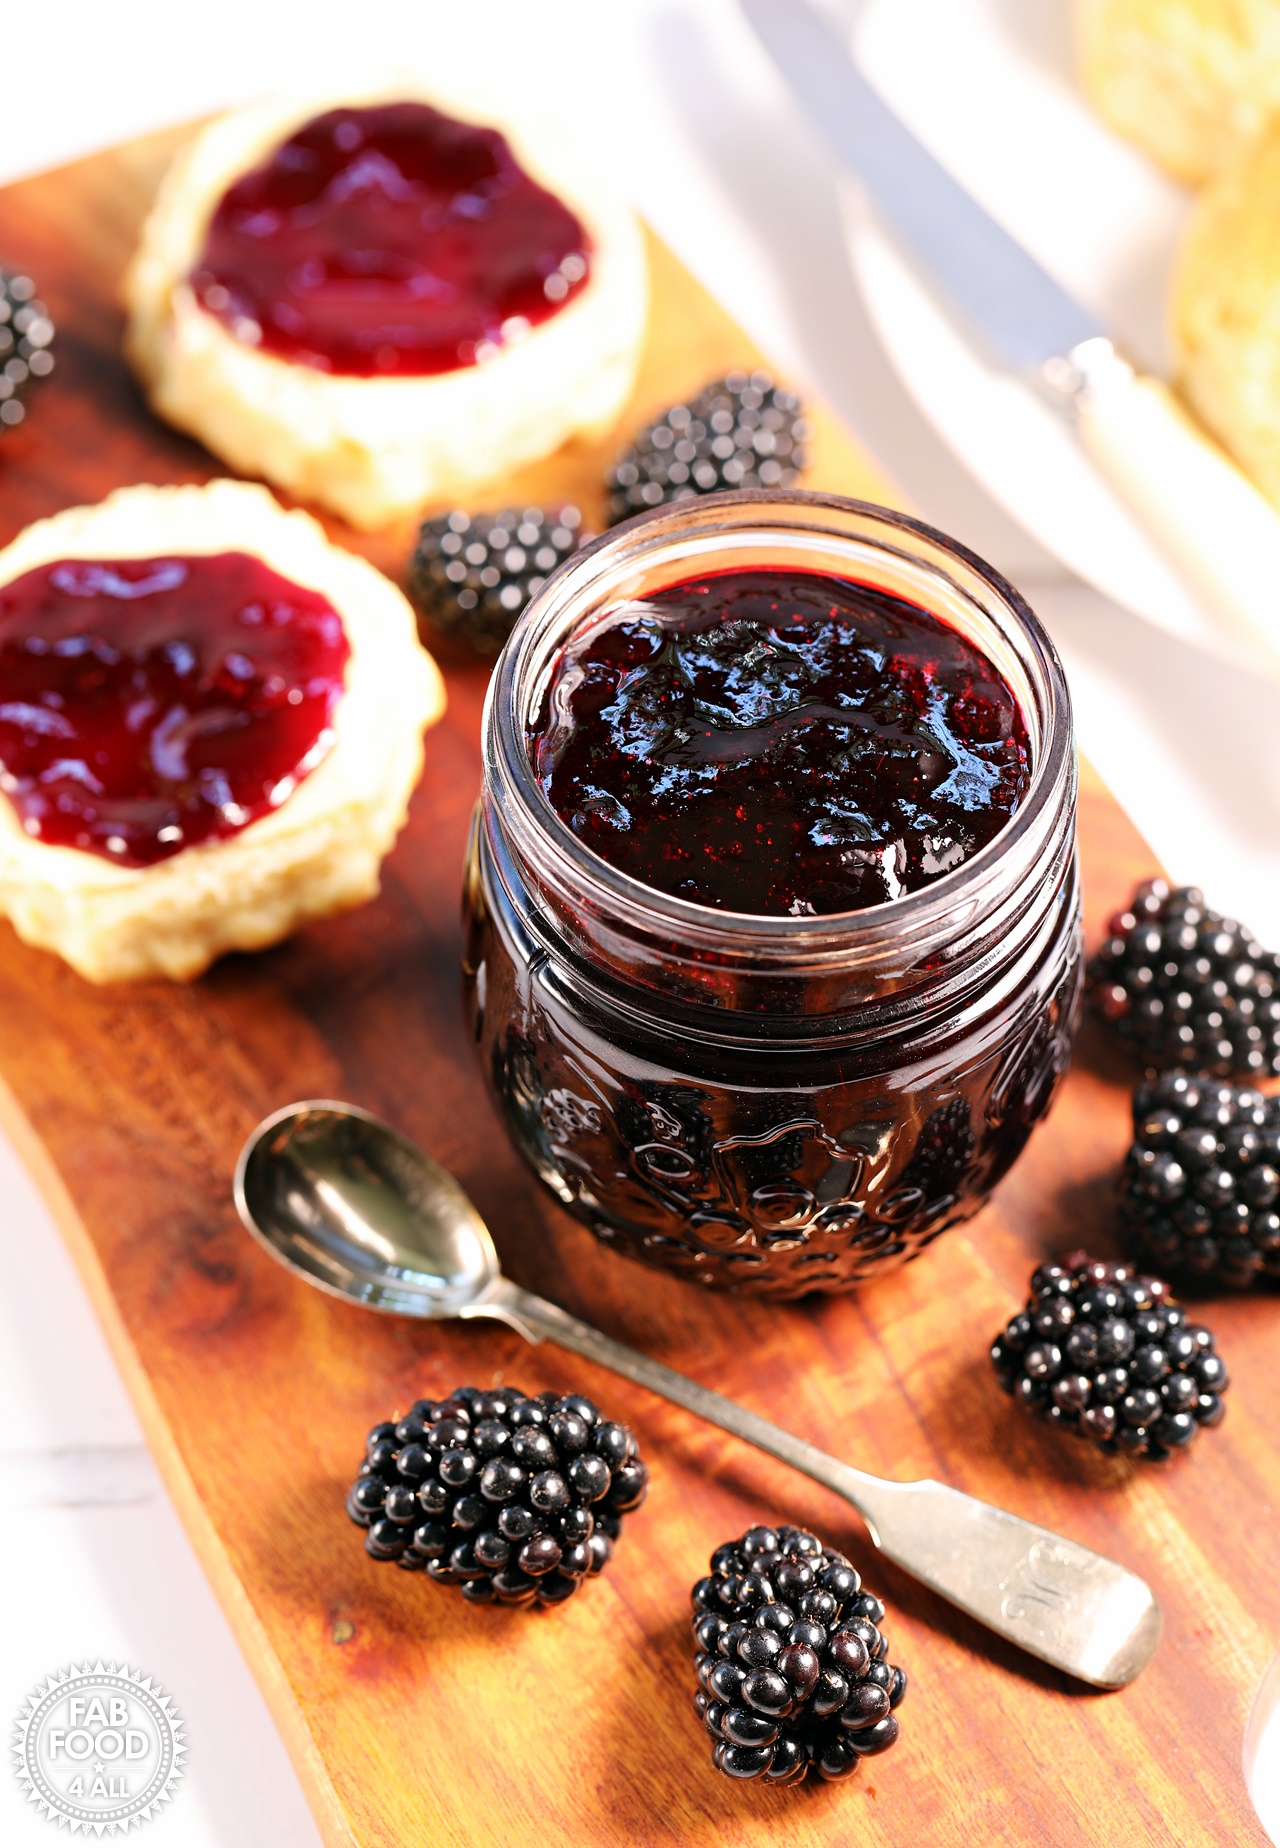
Well, my husband was first to try it on a scone and immediately gave it his seal of approval with “this is good”! He hates seeds in jam, so a jelly is ideal for him.
You can spread this and use it like you would jam, but you can also serve it with cheese.
I love the flavour and also the jewel-like quality and purity that you don’t get with jam.
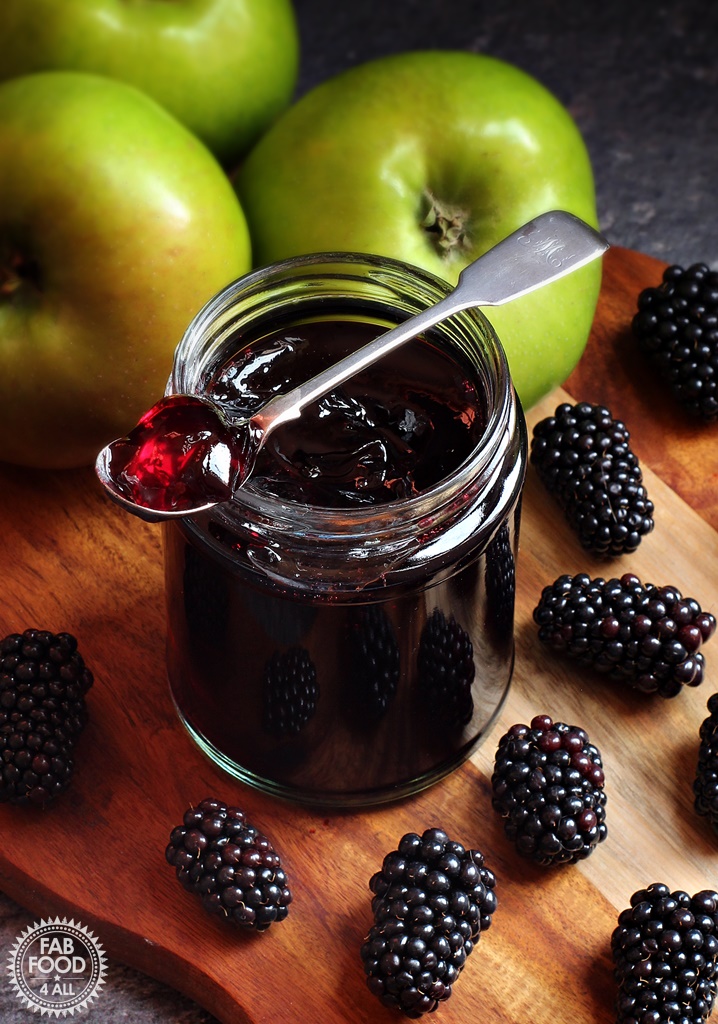
This recipe follows the principle of equal weights of blackberries and apples, so you can easily reduce the amount of fruit to what you have.
I made just over 8 x 300 ml jars and found that at a rolling boil, the jelly was reaching the top of my pan, so you definitely wouldn’t want to increase the amount.
If you like giving homemade preserves as Christmas presents, then this Easy Blackberry and Apple Jelly recipe is ideal.
Jelly Making Hints and Tips
- Avoid hexagonal jars; they can easily trap air bubbles.
- You can hold your jars at a slight angle when potting up to avoid trapping air bubbles around the neck.
- Avoid over-boiling; this may result in a jelly with tiny air bubbles trapped inside.
- If you find your jelly hasn’t set, just tip it back into your pan, re-boil, and do the plate test again.
- Smaller quantities are more preferable than the quantity I used
- Don’t under any circumstances be tempted to squeeze the fruit when straining; this will give a cloudy jelly.
- Jelly making follows the same principles of jam and relies on pectin to set, so low-pectin fruits will need lemon juice or additional pectin.
More Fruit Jelly Recipes
Once you’ve made my Blackberry and Apple Jelly, you might like to try the following jellies:
- Gooseberry, Apple & Mint Jelly
- Easy Crab Apple Jelly
- Rosehip and Apple Jelly
- White Currant Jelly – Jam
- Easy Redcurrant and Port Jelly
- Plum Jelly
- Grape Jelly
Blackberry Preserve Recipes
If you still have more blackberries to use up, then here are some delicious blackberry jam recipes:
- Easy Seedless Blackberry Jam (small batch)
- Easy Blackberry & Apple Jam
- Blackberry & Raspberry Jam
- Tutti Frutti Jam (Strawberry, Blackberry, Blueberry & Raspberry Jam)
- Blackberry Curd
I know you’ll love my Blackberry & Apple Jelly, so don’t forget to tag @FabFood4All on social media or leave a comment below when you make it. I love hearing from you!
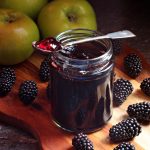
Pin my Easy Blackberry & Apple Jelly for later!
Easy Blackberry & Apple Jelly with step-by-step video tutorial
Ingredients
- 1 kg blackberries
- 1 kg Bramley apples
- granulated sugar 450g per 500 ml juice
- water
Instructions
- Soak and rinse the blackberries to get rid of any insects etc.
- Cut the apples into dice (don’t peel or core).
- Place the fruits into a preserving pan or similar with enough water to barely cover.
- Gradually bring to the boil and then simmer for 1 hour (uncovered).
- Strain the fruit (see notes) and leave for at least 2 hrs or overnight covered with a tea towel. (Do not under any circumstances be tempted to push or squeeze the fruit, this will result in cloudy jelly).
- Place 2 – 3 saucers in the freezer for testing set.
- Measure the juice and stir in 450g or granulated sugar for each 500 ml of juice. (Mine measured 1.85 ltr to which I added 1.665 kg sugar).
- Heat gently to dissolve the sugar, stirring constantly.
- Remove any scum with a slotted metal spoon.
- Once the sugar has dissolved slowly bring the pan to the boil and once at a rolling boil, time for 20 minutes, then take off the heat.
- Test a few drops of jelly on a chilled saucer and pop in the fridge for a minute.
- Push you finger through the jelly and if it crinkles and forms a gel like clot which you can tip over then it’s ready. If not carry on boiling for 2 minutes and repeat plate test until set achieved.
- If there is any scum left then remove (there shouldn’t be now).
- Then pot up into hot sterilised jars (see notes) using a ladle and jam funnel if you have one and place lids on immediately.
- You may find the jelly tries to set before you get it in the jars, if this happens then just set the pan over a low heat.
- Store in a cool, dark place and once opened keep in the fridge.
- Unopened jars will be good for at least a year and most likely much longer.
Cherry
I skip the pot and stew and strain overnight by one simple step using a steam juicer it creates your clear juice ready for sugar and leaves the pulverised fruit in the top pot which I then freeze and eventually make into fruit leather or fruit roll-ups which can be a sweet kick when I’m craving a snack. It also means you have a concentrated juice of whatever fruit it is to jar up and seal for use all year even after harvest season. I live on a non-working farm and we are surrounded by blackberries/brambles damsons, haws, and crab apples so I can often be seen in season along the hedgerows with my baskets and buckets, for jelly jam and sauces all for the price of the sugar.
Helga Eyers
Thank you, got a few scratches from today’s forage and in the process Olof making jelly as I type, just waiting for the juices to drip through the Muslin cloth, will just leave it overnight and complete tomorrow. So looking forward to a. We batch
Camilla
Awesome, I so want to get foraging!
Helga Eyers
I made this last year adding lemon juice which gave it just a little bite. It was a great hit with everyone and as the blackberries are again plenty full, I shall be foraging and making this again. Thank you for the recipe, it is delicious
Camilla
Thank you Helga, that’s great to hear and lovely that you made you own mark on the recipe. Happy foraging:-)
Barbara
I substituted mulberries for blackberries and added elderflower cordial to taste (about 1/8 cup) before adding the sugar. My family loves it, my grandaughter eats it off the spoon! Thank you for the inspiration.
Camilla
Sounds wonderful Barbara, glad to have inspired you:-)
Sarah
Reduced this recipes to 1/5 and it made a jar exactly!
200g blackberries
200g apples
225g sugar (we got 250ml of juice)
We did the set test at about 15 minutes.
Thank you so much for this recipe, we will definitely be making more!
Camilla
Excellent Sarah, so glad you like the recipe:-)
Tamela
Never had done anything with apples, does the jelly not need to be water bathed or pressured?
Camilla
Hi Tamela, here in the UK (and most of Europe) this is how we make jelly/jam and it is shelf stable. If you prefer to water bath then you’d need to refer to your jar’s instructions.
Irene Williams
We love Bramble Jelly and eat it with lamb. It used to be readily, commercially available in the UK but isn’t now.
I’ve made my own in the past, but found it hard work and this year the blackberries were over almost as soon as they’d flowered.
I’d found a small bag, that I’d gathered before they all shrivelled, at the bottom of the freezer and used your recipe.
Thank you, thank you, thank you….
Made overnight finished today.
I will always be using your recipes!
Camilla
Aww, that’s so wonderful to hear Irene, thank you so much:-)
Jenny
Like you, I’ve always been a bit wary of the word fruit `jelly` but it was well worth trying this recipe. The taste is fabulous and very addictive. Just going out for a walk to find more ingredients. Thank you
Camilla
Excellent Jenny, so glad you like the recipe:-)
Sarah jane Gaffney
I used 1.5 kg of both just because that was how much we had picked and we got 9 jars out of that. Recipe was spot on thank you
Camilla
Excellent Sarah, thank you so much for your feedback:-)
Shelagh
Camilla, once again you are spot on.
I used a combined weight of 600g brambles/bramley and was a wee bit short of a normal jam jar + 2 little glass “yoghurt pot” jars, delighted!
The little jars are just right for a gift, I find the reusable silicone cap vacuums on nicely too.
I now have a selection of your jams in my pantry, all one punnet recipes.
Is it too much information to know my tights washed clean and I reckon they would be wearable at a push . . . .
Camilla
Oh Sheila, you’re such a tonic, I just laughed so hard:-) So glad you like this and my other jams, that’s lovely to hear:-)
Rosemary
I used 850g apples and blackberries but only got two smallish jars! Maybe I didn’t use enough water to simmer the fruit. It looks good though so may try again with this year’s crop. Thanks for the recipe.
Camilla
Is that total weight? Otherwise hard to know what went wrong, the recipe is tried and tested and works as written.
Dot Bowen
The jelly was nice but the yield really terrible. Forget small batch it was miniscule.
I also thought the fruit pulp before straining was “dry”.
Still delicious, just need to increase amounts.
Camilla
Hi Dot, it sounds like you had the heat too high and or not enough water to begin with which would account for you thinking the fruit was too dry. My fruit yielded 1.85 ltrs or juice on straining yielding 8 x 300 mls jars.
Georgina Gowland
Wow! This was so easy and worked so well. Tastes absolutely delicious. Thank you
Camilla
Thank you Georgina, so glad you like it, it’s one of my favourite jams:-)
Michelle Rao (Gilson)
are these metric measurements ? how do I convert them ? Please add my email to your list I tried but your link failed ty
Camilla
Hi Michelle, sorry for the late reply I’ve been working all day (and night) and yes they are metric measurements for which you’ll need a set of scales. You can’t convert a weight to a volume as it won’t be accurate. So I could send you off to a conversion website but chances are that the resulting jam would not be a success because of it. Today I thought I’d try to make a blueberry jam and give cup measurements but depending on the size of the blueberries the difference in weight between 1 cup or blueberries and the next was anything from 124 to 142 grams which wen you multiply up gives a huge difference to the total recipe. So I gave up as realised it just couldn’t be done (which I already knew really). Regarding your signing up to my news letter, that’s something you’ll need to do, perhaps try again or on another device. I’ve removed your e-mail from the comment to protect your data.
glenn hutton
I use to go blackberry picking when I was a child and it has some great memories… Might take this up again if I can make recipes using them like this one!
Camilla
Me too, great to go full circle with these things and this is such a awesome jam:-)
Shannon Hepburn Carey
Do you need a water bath or any other extra step in the canning process? I’d like to try this but I want to make sure it won’t spoil edits I get to enjoy it all. We don’t do much jams and jellies in the house regularly.
Camilla
Hi Shannon, we don’t water bath jams in Europe and elsewhere. This jam is shelf stable providing you sterilise your jars first and follow my instructions:-) It’s best eaten in the first year for optimum colour and flavour but the sugar will preserve it for years. Just keep in a cool, dark place to keep it at its best. I keep mine in a cupboard in my garage.
Margaret Gallagher
Still have quite a few in my freezer – perfect recipe all the family will love
Camilla
Excellent Margaret:-)
William Gould
We grow our own blackberries and have a couple of apple mini-trees, so I’ll save this for next year!
Camilla
Great, I’m sure you love this jam:-)
Susie Wilkinson
I will be passing this onto my Dad, he always makes blackberry and apple jelly from his home grown fruit!
Camilla
Thanks Susie:-)
All That I'm Eating
This is such a great colour Camilla, it looks so appetising! I would love a huge spoonful on some toast!
Camilla
Thank you, I had some this afternoon on toast LOL:-)
francesco caselli
Thank you for sharing this delicious recipe! i love it
Camilla
Thank you, so glad you like it:-)
Kavita Favelle
Blackberry and apple jelly is one of my favourites to make (as well as plain apple and plain blackberry ones). So simple and sooooooooooo delicious!
Camilla
I’m am officially a jelly addict as well as a jam addict now:-)
Heather
I had no idea it was so easy to make jelly! I love the helpful things to be aware of section and this looks absolutely delicious! Great flavor combination .. very creative!
Camilla
Thanks! I know Heather, I didn’t realise I could be so easy either – currently making up for lost time!
Claire Jessiman
I love Jelly although to me this is most definately Bramble 🙂 I’ve got a jelly bag and hang it between two chairs using a hockey stick. Hadn’t come across the tip about hexagonal jars before so will bare that in mind.
Camilla
Me too! At least this way no-one has to give up their seat or stop playing hockey LOL:-)
Ruchi
Absolutely amazing idea to combine apples and blackberries in one delicious jelly. I love seasonal products and how much vitamins they give!
Camilla
Thank you Ruchi:-)
swathi
Your blackberry apple jelly sounds perfect love that simple smooth texture and color. I am yet to try this combo may be next time. when can try this recipe.
Camilla
Thanks Swathi, it is a fab flavour combination:-)
Veena Azmanov
This jelly is absolute perfection. I love the color you have from the blackberry – glorious. We love jelly but I have just to combine blackberry and apples. Sounds perfect. I’m going to try soon.
Camilla
Thanks Veena, it is a beautiful colour with a flavour to match:-) I’m sure you’ll love it!
Tina
I love the combination of the berries and apple as I have never thought to combine the two before. I think this would go great on some fresh baked bread! Thanks for the tips for straining the fruit!
Camilla
Thanks Tina, yes some freshly baked bread would go beautifully:-)
Lauren Vavala
This is so helpful! I’ve been hesitant to make blackberry jams because of the seeds, but they are my favorite berry – will have to give it a try!
Camilla
Thanks Lauren, yes that the beauty of jellies, no seeds:-)
Padmajha Sureshbabu
I first saw this pic on instagram and could not stop drooling! Such beautiful click Camilla! I haven’t made jams or jeliies before but going through your post, I find it so detailed and the process explained so well! This really tempts me to try!
Camilla
Thank you so much, so pleased that you are tempted to make jelly now:-)
Tammy
Your jelly is absolute perfection. I love the idea of blackberries and apples together…I’ve never had blackberry jelly but it sounds and looks amazing! ^_^
Camilla
Thank you Tammy:-)
Nicolas
Wow very nice! this would go well with any dessert! (:
Camilla
Thank you Nicolas:-)
Valerie
I don’t like seeds in my jams either. I bet this would be great on English muffins or pound cake. I had no idea you could use tights to make jelly.
Camilla
Thanks Valerie, I might go with a crumpet later:-)
Jemma
Beautiful photography Camilla! The jelly looks great and I love your comprehensive tutorial.
Camilla
Thank you so much Jemma, hopefully it will inspire people to start making jelly:-)
Becca @ Amuse Your Bouche
Camilla this looks gorgeous! (your photos are looking so good lately!) I love a seedless jelly so this looks right up my street 🙂
Camilla
Thank you so much Becca, I have been spending some time learning more about photography so glad it’s paying off:-)
Elinor Hill aka Beach Hut Cook
Such a great way of using up a glut of apples and no peeling or coring. I love making jellies.
Camilla
Yes, I shall be making more jellies from now on:-)
Janice
Gorgeous photos and a beautiful jelly. Well done you!
Camilla
Aaw, thank you Janice:-)